Routes
The Routes system is a feature that allows you to visualize the movement history of a registered device based on location data recorded over time in RemotaSafe. In addition, RemotaSafe provides tools for navigating route records, generating reports, and more.
Interface
Below is the layout of the Routes side tab:
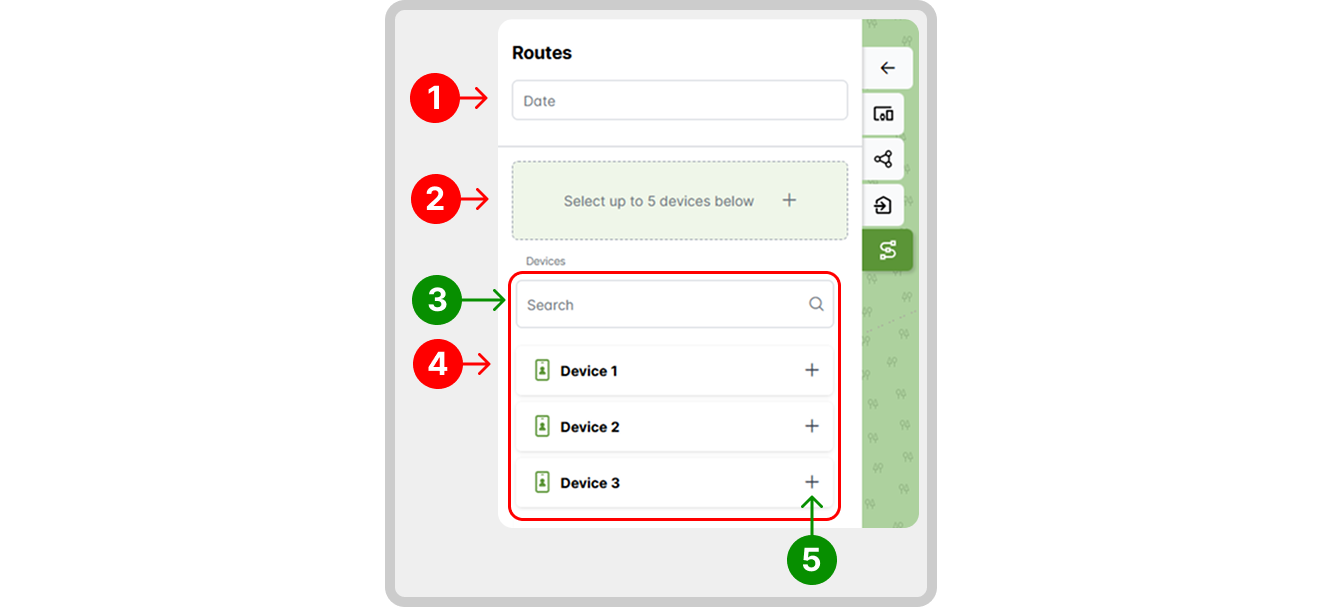
- Filter by date or period.
- Selected devices.
- Search by name filter.
- Available devices list.
- Select device.
Date/Time Filter
- Click on the date/time filter: a pop-up tab will open;
- Date: select a start and end date in the designated fields.
- Time: set the start and end times in the fields corresponding to your dates.
You can also select dates directly using the filters for today, the last 7 days, or the last 30 days.
Workflow
To perform a search, follow these steps:
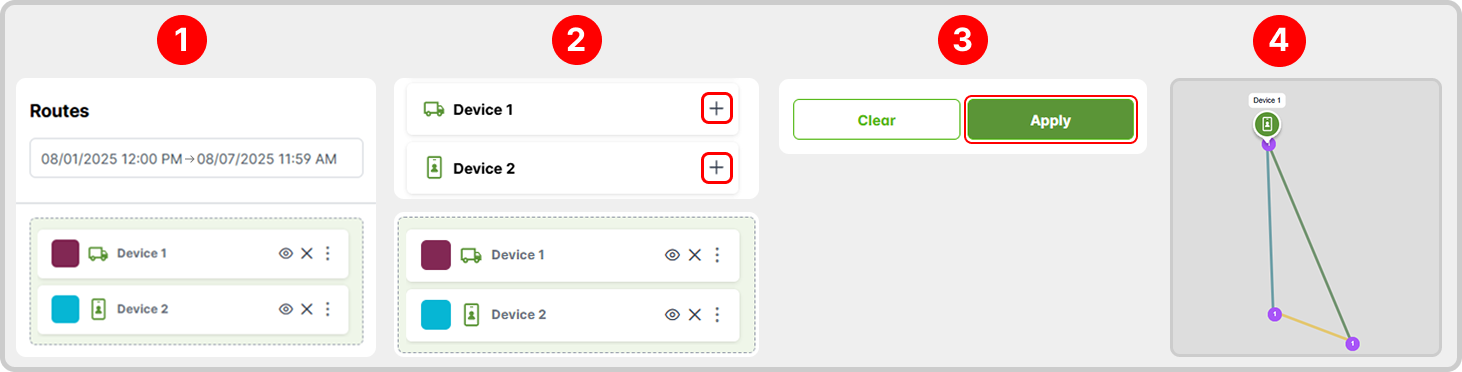
- Define the date or time period for the search.
- Select the desired devices (maximum of 5 devices per search).
- Click "Apply" to run the search for the selected devices' route history.
- Visualize the devices, path points, and route lines on the map.
See the "Route History Timeline" section to learn how to use the navigation controls for historical data.
Route History Timeline
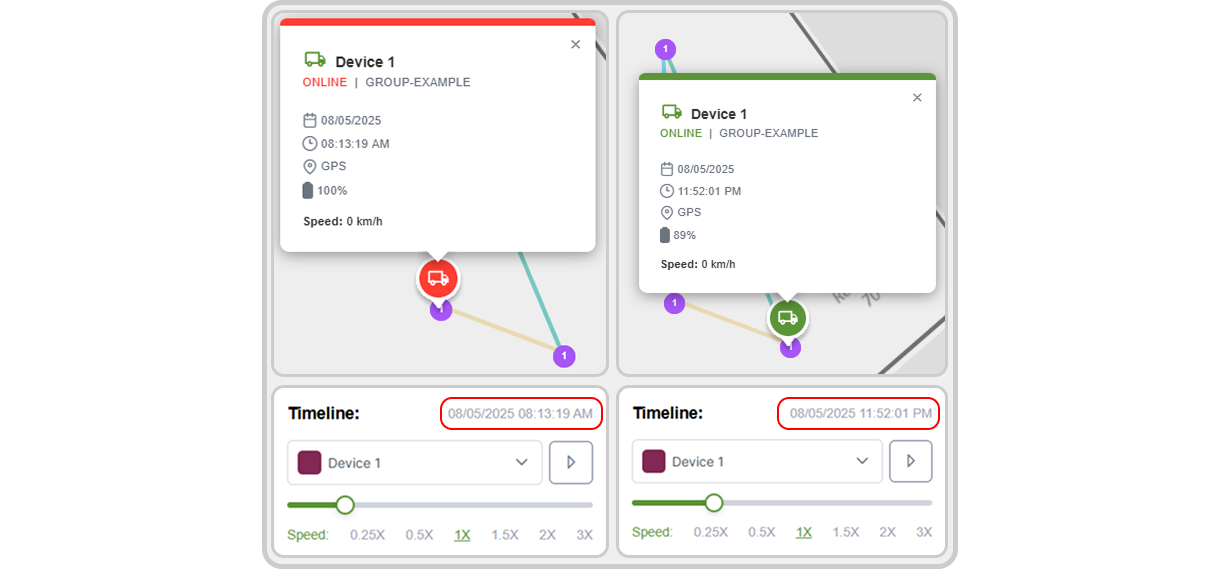
The route history timeline allows you to easily navigate through the recorded data.
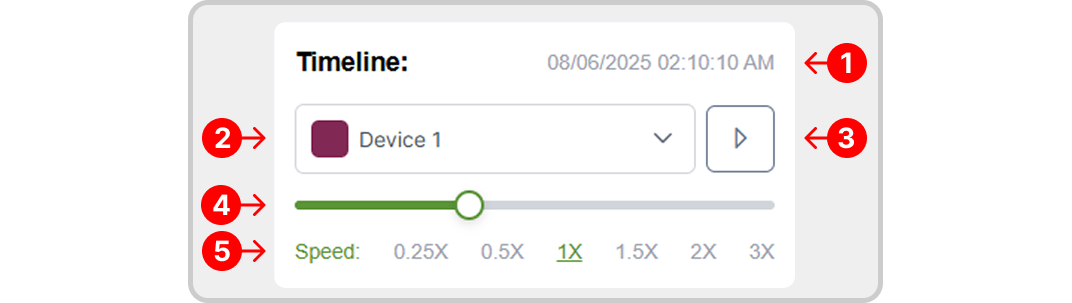
- Date and time of the current progress bar point.
- Selected device for route history viewing.
- Play/Pause timeline playback.
- Progress bar.
- Playback speed.
Using the progress bar, you can follow the device's movement in a simple and dynamic way. Click on specific points along the bar to jump through the route history.
Additionally, you can click the device on the map to see more information at that specific point in time, such as its emergency status, date, location type, and more.
Devices with Location History
For devices where location records are found, the sidebar listing allows you to:
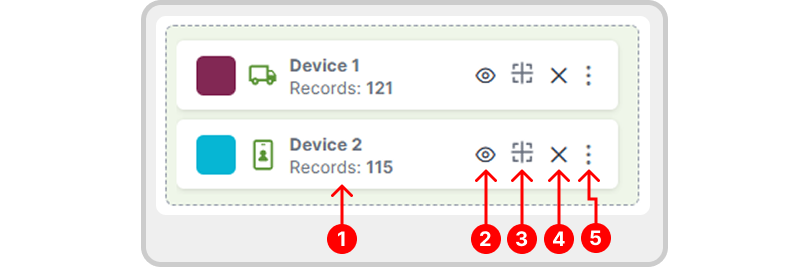
- View the number of records found.
- Toggle route line visibility.
- Center device on map.
- Remove device from the list.
- Access additional options for the device.
Report Generation and Export
After performing a location history search, you can export the results as a report. Follow these steps:
- Click the "Export Report" button located below the date filter.
- A preview of the route report will appear, sorted by date and time (ascending).
- Click the "Download" button to export the file.
The file is exported exactly as shown in the preview, meaning it will be in ascending chronological order.
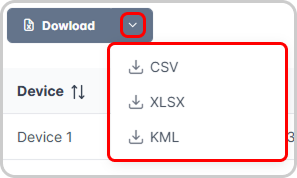
By default, the report is generated as a .XLSX file. You can choose other formats by clicking the arrow next to the "Download" button.